PROCESS
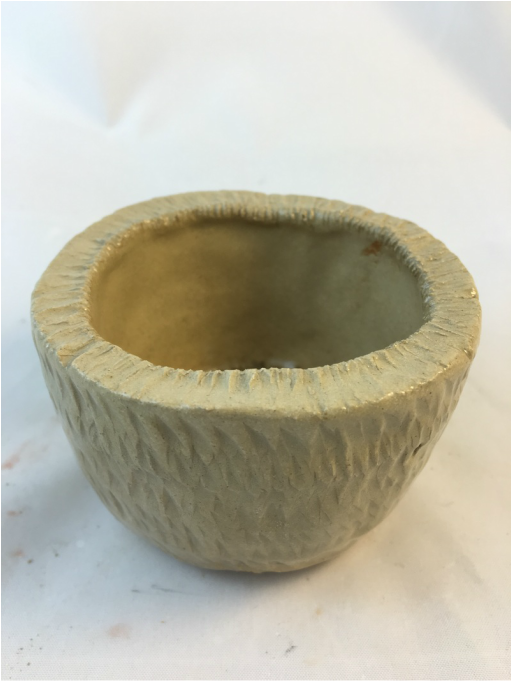
- First I rolled a ball of clay until I reached as close to a circle as I could.
- I then pressed my thumb into the center of the clay leaving about half an inch of thickness on the bottom.
- I gently pressed into the mold using the four fingers on the outside and my thumb in the inside.
- I repeated step four while rotating the pinch pot continuously (patience is key).
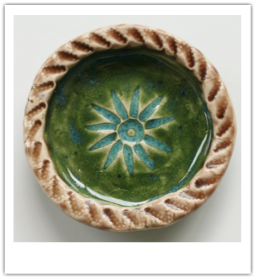
- Once I reached my desired shape I used needle tools to carve a flower onto the inside of the pinch pot.
- By using using a needle tool I recreated a dirt like feature to surround the flower.
- I created grass like features on the rim of my pinch pot to add a nature like feel.
- In order to not leave the outside of my pinch pot completely bare I used the same needle tool to engrave "grass" on the outside.
INSPIRATION
I wanted my pinch pot to look "normal" on the outside but create a pleasant surprise on the inside by carving a flower. I liked this simple yet classy look because it isn't to "busy" but that didn't mean the look it captures is boring either. Overall this looks achievable and appealing so here goes my first project!
I wanted my pinch pot to look "normal" on the outside but create a pleasant surprise on the inside by carving a flower. I liked this simple yet classy look because it isn't to "busy" but that didn't mean the look it captures is boring either. Overall this looks achievable and appealing so here goes my first project!
FINAL PRODUCT
I am content with my final product and I think for my first try it was a nice starting point for my intro to ceramics.
I am content with my final product and I think for my first try it was a nice starting point for my intro to ceramics.
 |  |
 RSS Feed
